
Coinbase Ranks As Second Largest ETH Staking Entity As Lido’s Dominance Raises Concerns
October 8, 2023
OpenSea ‘unaware’ of any involvement of former exec in $60M rug pull
October 9, 2023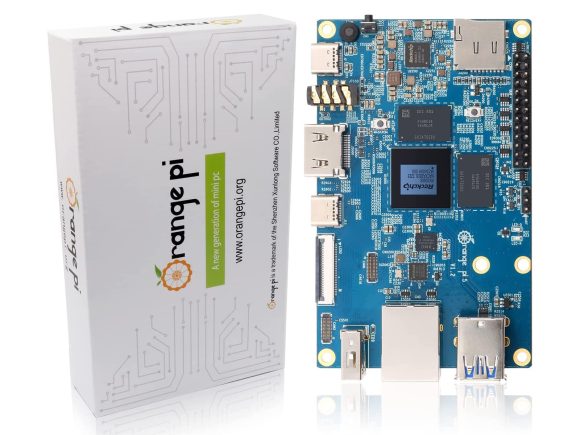
VerusCoin (VRSC) is an interesting project that has been available for a while already, but has more recently been generating attention among miners this year thanks to its ability to efficiently mine it with power efficient ARM-based devices such as smartphones and microcomputers. The focus of this article is how to set up VerusCoin (VRSC) mining on an Orange Pi 5 device (similar to Raspberry Pi, but more powerful) thanks to the use of a Rockchip RK3588S 8-core 64-bit processor that is capable of quite decent performance with a low power usage, making it one of the best options for efficiently mining VRSC or other similar crypto coins. We are going to be doing a separate guide on how to mine VRSC on an Android-based mobile device, so stay tuned for that as well…

So, what do we need to get started? Obviously, we first need to acquire an Orange Pi 5 board, a 5V USB-C power adapter capable of at least 10 Watts (2 Amps), along with an additional cooling as the CPU gets hot while mining as you should already know, then we also need a 16GB/32GB micro-SD flash card with a card reader. Do note that we don’t need the more complex, feature rich and expensive Orange Pi 5 Plus variant for mining or the 5B wit WiFi module, nor do we need more than the cheapest 4GB RAM version of the Orange Pi 5 board (it is available with up to 32 GB RAM). The official white power adapter capable of 5V 4A is fine for the purposes we are going to use the device, so you can get that one or skip the extra cost if you already have a 5V capable of 2A or more USB-C power adapter sitting unused. As for cooling, there are a number of options available, though the GeeekPi Orange Pi 5/5B Cooling Fan with Heatsink does seem to be a popular solution for active cooling that does the job well, even though it could’ve been made even better and more efficient. You would also need an ethernet cable to connect the Orange Pi 5 to a router or a switch for Internet connectivity, since we are not using the more expensive 5B versions that has an extra WiFi adapter, although you might want to go for that one and ditch the cables as well and go the wireless way.
Summary of what we need:
– Orange Pi 5 4GB with Rockchip RK3588S @ $79.99 USD
– Orange Pi 5 4GB with Rockchip RK3588S + PSU @ $89.99 USD
– GeeekPi Orange Pi 5/5B Cooling Fan with Heatsink @ $17.99 USD
– SanDisk 32GB Ultra MicroSDHC UHS-I Memory Card with Adapter @ $9.95 USD

After we have all the available hardware for our mining setup we need to prepare the software, the first thing is to download the latest Ubuntu Server image for the Orange Pi 5 board we are using, you can do so from the official Oange Pi 5 Ubuntu repository here, make sure you download the Orangepi5b_1.0.2_ubuntu_jammy_server_linux5.10.110.7z image from there as we don’t really need to use the desktop versions for our mining purposes. The image is archived with 7-Zip (7z), so you need to decompress it first and extract the Orangepi5b_1.0.2_ubuntu_jammy_server_linux5.10.110.img file from the archive that you will then proceed to write on the micro-SD flash card. There are a number of tools available for writing image files to flash cards, but one of the easiest and straightforward ones we like is the Balena Etcher, you can go for the portable version that does not need to be installed first and can directly be run and go to flash the Ubuntu IMG file on the micro-SD flash card.

While the image is being written on the SD flash card you can proceed and install the GeeekPi Orange Pi 5/5B Cooling Fan with Heatsink on the Orange Pi 5 board, it is a straightforward and easy to do so, even though the manual you get with the cooler can be a not so user friendly. There is quite a bit of a gap between the CPU of the board and the cooler when you are assembling it and it is covered with the included thermal pad that ensures thermal transfer, though less space and good thermal paste would probably make for much better thermal conductivity resulting in further lowering the operating temperature while mining. That is something that needs some extra work, but it is not necessary for the normal mining operation of the Orange Pi 5 as even with the default setup of the cooler when you plug in the fan the operating temperature under load sits at around 65 degrees Celsius (it quickly hits 85 without the cooling) while the idle temperature we have measured after an hour of being plugged in was in the 40s. You need to be careful when plugging in the power pins of the cooling fan in the board’s header pins. You need to use the second and third pin on the side near the edge of the board closer to the flash card slot, the second pin is for the red (power) cable and the third is for the black (ground) cable. Connecting them right should result in the RGB lighted fans to start spinning (why the need for RGB here?) when you plug in the power cable and turn on the Orange Pi.

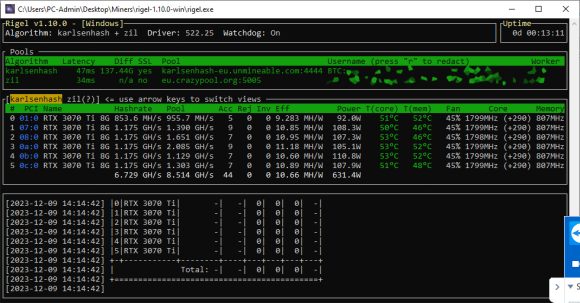
After you flash the Ubuntu server image on the micro-SD card, insert the card in the Orange Pi 5 slot, attach the cooler and fans, connect the Ethernet cable to your router or switch and the board you need to plug in the USB-C power adapter and everything should work just fine. Now you need to figure out what is the IP of the Orange Pi 5 in your local network as the device will utilize DHCP to get an IP address assigned automatically (unless you do not have active DHCP service in the local network). An easy way to see the IP address is to use an IP scanner and scan the IP range that your router uses (usually either 10.X.X.X or 192.168.X.X). We like the ease of use of the Angry IP Scanner especially the Legacy version that we’ve been using for ages, though feel free to use any IP scanner you like. Alternatively, you can also check if your router has a page reporting all the connected devices and their IPs, that could also work, the Orange Pi 5 should report itself with a hostname orangepi5b.lan. In our case the IP address of the Orange Pi 5 board we’ve had was 192.168.1.73 as you can see from the screenshot above, you’ll need this address in the next step where you will actually connect to the Orange Pi 5 via SSH with the help of PuTTY or your favourite SSH client.
The default username of the Orange Pi 5 Ubuntu Server Linux distribution is root and the default password is orangepi, so you’ll be using these to login and you can change the user and or password should you wish to make things more secure etc. The next step you need to do is to install the VerusCoin (VRSC) miner that you will be running on the Orange Pi 5 and for that we are going to be using the optimized ARM version of ccminer from Oink70. What you need to run now over the SSH connection to your Orange Pi 5 board is the following command:
curl -o- -k https://raw.githubusercontent.com/Oink70/Android-Mining/main/install.sh | bash
It is an installation script that will update your Ubuntu Linux and make sure it has all the needed libraries installed for the miner to work and then also download the latest ccminer, so you would be able to start mining after this procedure is finished, it could take a bit to download and install everything, so be patient. If there are no error messages when the installation script finishes you are good to continue, if you encounter some errors you might want to restart (literally type restart) the Orange Pi 5 and then reconnect and run the installation script to finish properly with the updates this time.

The next step is to edit the configuration file where you will enter your pool address and wallet address, there are already default ones set in the config, so make sure you change them, so that the miner will mine to your own VRSC wallet. You can check to confirm everything is working properly in the statistics of the pool you choose when you finish setting up everything and actually start mining. To edit the configuration file first enter the folder where the miner has been setup using cd ccminer and then just type:
nano config.json
Make the changes for the pool address (url) and the wallet address (user), the default config has a main pool and a backup pool set, you can actually use these pools too, although we like to go for Luckpool, but you must change the wallet address to your own. After you finish changing hit Ctrl + X and confirm with Y that you want to write the changes. For easier editing you can alternatively use SCP connection with a software such as WinSCP for example that can make it easier to make changes, especially copy and pasting.
You can now do a test run with ./ccminer -c config.json in order to see that everything will be running just fine, before you configure the Orange Pi 5 to automatically start the miner on every start by taking advantage of the crontab functionality of Linux. If running the miner manually results in normal operation, then you can proceed to configuring crontab by running:
crontab -e
Then selecting 1 for the Nano text editor we’ve used in the previous step for the config file for the editing, go to the end of the file and type the following:
@reboot ~/ccminer/start.sh
Hit Ctrl + X and confirm with Y to save the changes you’ve made, then you can just type reboot to restart the Orange Pi 5 and when the device starts up again it will automatically run the ccminer and it will start mining VRSC. In order to check the current status of the miner you will need to login via SSH again and type screen -x CCminer to see the output of the miner, otherwise you will be presented with juts the normal command line after you login even though ccminer will still be running in the background.

What can you expect from the Orange Pi 5 mining VRSC in terms of hahsrate, well the latest ccminer does manage to provide you with around 6.6 MH/s to 6.7 MH/s hashrate with a power usage measured at the wall at 9W (using the official Orange Pi 5 white power adapter). Efficiency wise very good, especially when compared to what you can get from a desktop CPU that although might provide more hashrate will do so with significantly higher power usage compared to the Orange Pi 5. The hashrate and efficiency of the Orange Pi 5 mining VRSC is also generally better than what you’d normally get while using an Android-based smartphone to mine, though that could depend on a lot of factors.
In the end, a quick word about VRSC mining profitability on the Orange Pi 5. At the moment the price of VRSC is around $0.40 USD per coin and the current block reward is 6 coins and what you can expect to mine for a day with a single Orange Pi 5 device is around 0.08-0.1 VRSC at the moment. So, let us say you will be making around 4 US cents per day with something like half of that going for the electricity used as a rough estimate… it will take quite a while to even just pay off for the Orange Pi 5 itself. Profitability wise doesn’t make much sense to go for it at the moment, but if you like to play around and experiment with mining, then you are more than welcome to do so with Orange Pi 5 and VRSC mining. Just make sure not to blindly invest into a large-scale mining setups as the daily trading volume of VerusCoin is low and it might not be able to handle it very well and VRSC is already at over 89% of its total supply of coins. So, just be mindful of these things and do have a backup plan for what you can use an Orange Pi 5 for should you decide to stop mining VRSC, the good news is that this device actually has a lot of other possible uses aside from mining VRSC… unfortunately not a lot of viable alternatives in other things to mine with it besides VerusCoin though.
- Publihsed in: Mining Hardware|Tests and Reviews
- Related tags: ARM VerusCoin miner, ARM VerusCoin mining, ARM VRSC miner, ARM VRSC mining, mining VerusCoin, mining VRSC, Orange Pi 5, Orange Pi 5 crypto mining, Orange Pi 5 miner, Orange Pi 5 mining, Orange Pi 5 Verus, Orange Pi 5 Verus miner, Orange Pi 5 Verus mining, Orange Pi 5 VerusCoin, Orange Pi 5 VerusCoin miner, Orange Pi 5 VerusCoin mining, Orange Pi 5 VRSC, Orange Pi 5 VRSC miner, Orange Pi 5 VRSC mining, Rockchip RK3588S, Rockchip RK3588S for crypto mining, Rockchip RK3588S miner, Rockchip RK3588S mining, Rockchip RK3588S mining performance, Rockchip RK3588S Verus mining, Rockchip RK3588S VerusCoin hashrate, Rockchip RK3588S VerusCoin mining, Rockchip RK3588S VRSC hashratem, Rockchip RK3588S VRSC mining, VerusCoin, VerusCoin ARM ccminer, VerusCoin Lunux ARM miner, VRSC, VRSC ARM ccminer, VRSC Lunux ARM miner
Check Some More Similar Crypto Related Publications: